

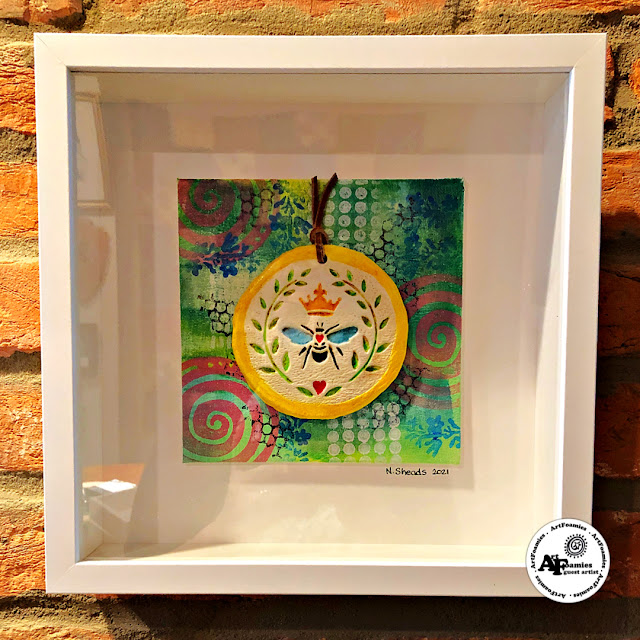
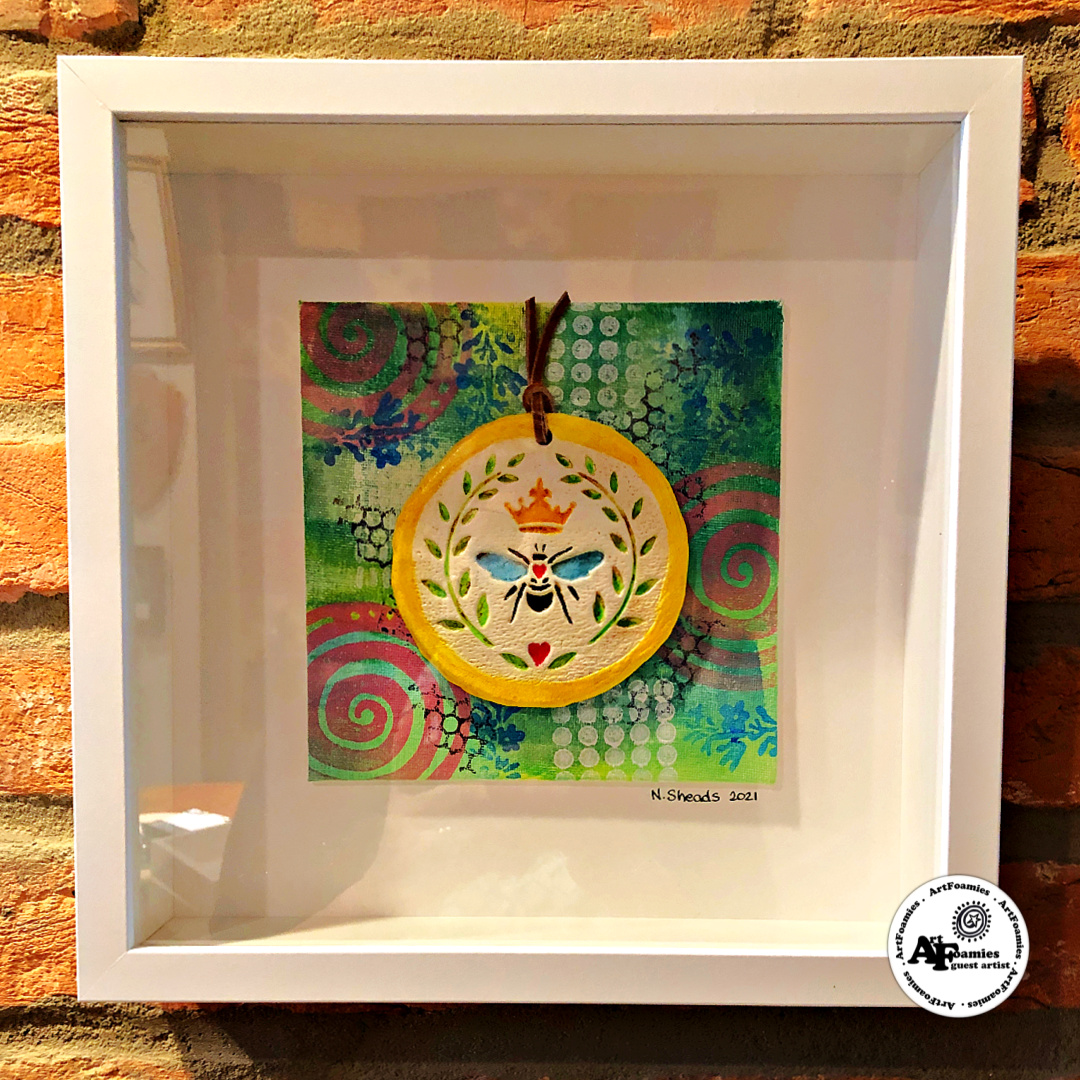
Queen Bee Shadow Box by Nancy Sheads
GOOD MORNING FRIENDS! As some of you know, I manage this blog for Kae Pea, so I'm usually behind the scenes. However, this week I'm the guest artist and I have a mixed media project that I hope you'll love. It features the Queen Bee Foam stamp as well as several others in supporting roles.
I'm usually a card maker and my main medium is Copic markers so this was really out of my comfort zone. But I was inspired by the clay work projects by Jenn White and Wendy Taylor-Aspinall so I decided to give this shadow box project a try.
Today's project features:


- Gypsy Soul | Queen Bee | Foam Stamp by ArtFoamies
- Emmie Roelofse | Lavender | Foam Stamp by ArtFoamies
- Balzer Designs | Dino Skin | Foam Stamp by ArtFoamies
- Kae Pea – Microcosms by ArtFoamies
- Honeycomb Texture Background by 100 Proof Press
- Stamp Buddy by ArtFoamies
- Assorted Liquitex Acrylic Paints
- Creative Paperclay Modeling Material
STEP BY STEP
Clay Medallion
- Tape a piece of Glad Press 'N Seal (sticky side down) on your work mat to prevent the plastic from moving while working with the Creative Paperclay.
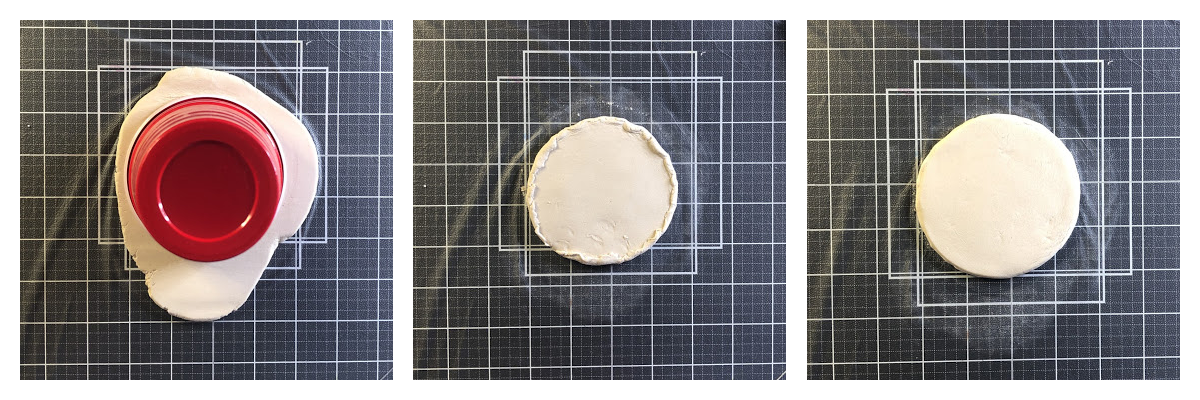
- Rolled out a small amount of Creative Paperclay so that it is larger the Queen Bee stamp and about 1/4" thick.
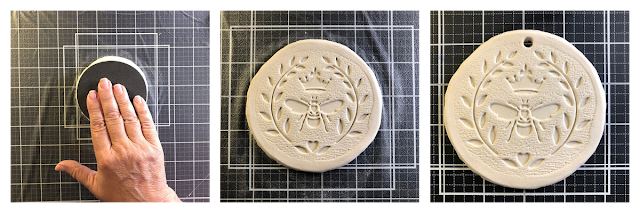
- Cut the Paperclay in a circular shape slightly larger than the stamp. I used a plastic drink cup to cut a circle out of the Paperclay.
- Carefully lifted the circle from the plastic and lightly rolled any frayed edges to the back of the circle. Lightly rub the surface with a tiny amount of water to smooth out any imperfections.
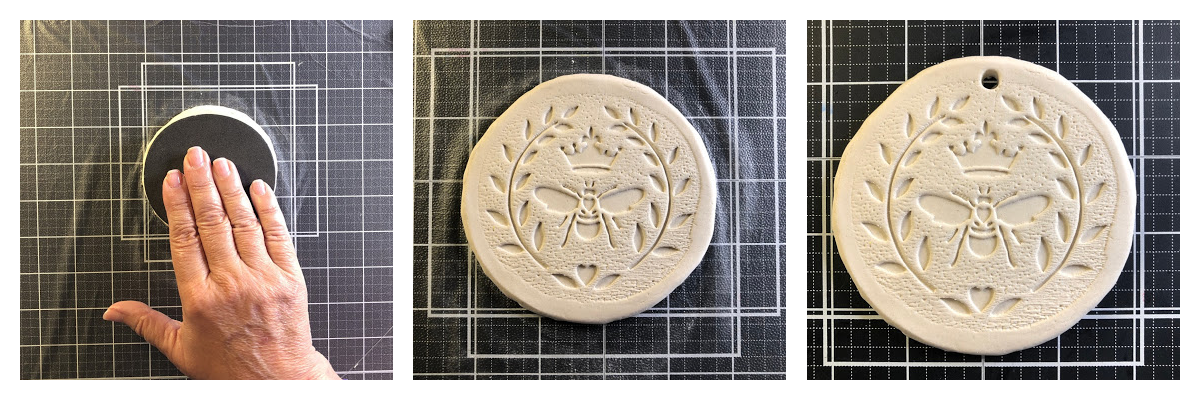
- Press the Queen Bee stamp into the Paperclay with even pressure. Lift the stamp and clean immediately to remove any residue from the clay.
- Make a small hole at the top of the clay medallion using a plastic drinking straw.
- Allow clay to thoroughly dry. This may take a few days. You can also bake the clay in an oven at 250 degrees for 30 minutes or until dry. See Craft Tips for Creative with Paperclay Products for additional information.

- Apply two light coats of white gesso to front and back of the clay medallion. Allow gesso to dry thoroughly between coats.
- Select acrylic paints in desired colors. I used Liquitex Basics in Brilliant Yellow Green, Light Green Permanent, Primary Yellow, Primary Blue, Primary Red, and Titanium White. You can mix color to get desired shades. I added white to create paler colors.
- Apply first coat of paint as a light wash (I mixed each color with a small amount of water).
- Apply second coat, deepening colors as desired.
- Apply two lights coats of Gloss Gel Medium. Allow medium to dry between coats.
- Create a brown wash (water + paint) and lightly coat the medallion. Lightly wipe off the paint, allowing the color to remain in the indentations and crevices of the medallion.
- Complete any additional painting and apply another light coat of Gloss Gel Medium to seal.
- Set aside and allow medallion to dry thoroughly.
Background
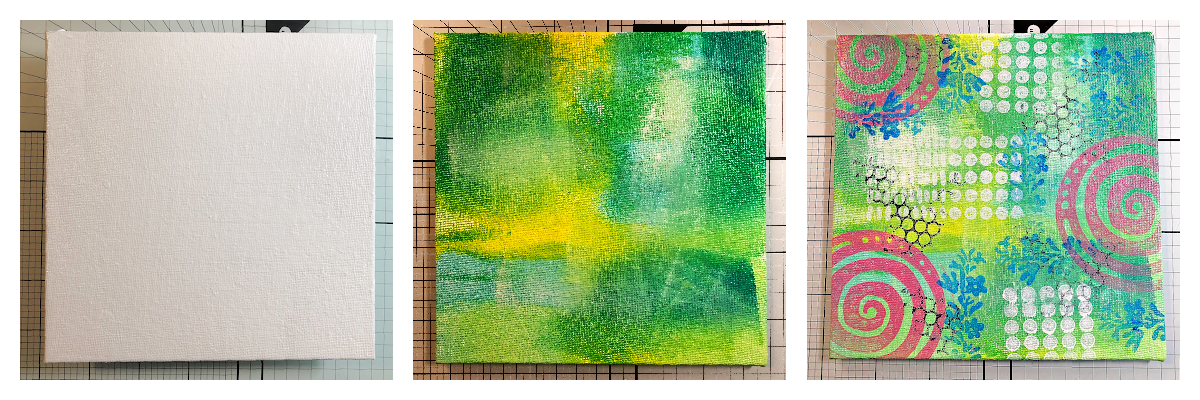
- Apply two light coats of white gesso to a 6"x6" canvas panel. Allow gesso to dry thoroughly between coats.
- Randomly brush a couple of acrylic paint colors onto the panel. I used the same colors as the medallion, applying patches of Brilliant Yellow Green, Primary Yellow, and Primary Blue (mixed with Titanium White). Allow paint to dry.
- Apply a light coat of Gloss Gel Medium to seal the first layer of color.
- Apply acrylic paint to Stamp Buddy to use as an stamping pad. Use the Stamp Buddy to apply paint to the ArtFoamies of your choice and stamp randomly on the canvas panel. I used Microcosms, Lavender, Dino Skin, by ArtFoamies.
- Apply a light coat of Gloss Gel Medium to seal the second layer of color.
- Stamp Honeycomb Texture Background with Archival Ink in black.
- Set aside to dry.
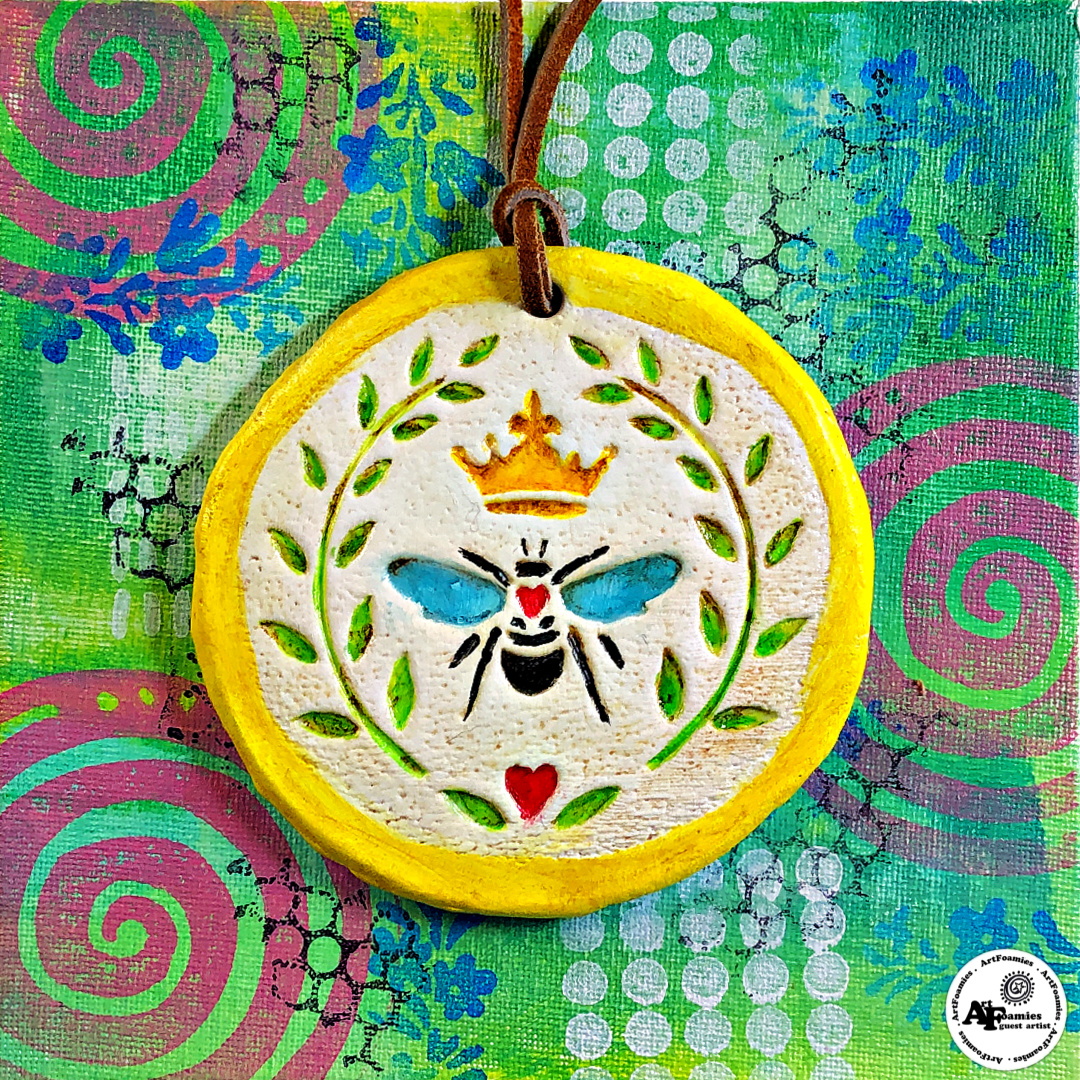
- Thread a small piece of rawhide through hole in clay medallion and tie.
- Glue medallion to canvas panel.
- Frame in shadow box if desired.
That's all for me today! Hope you enjoyed this week's project. See you again soon!
Nancy